The Strategy of Setting Up Mywifiext
Get support for you wifi device. We are here to answer all your questions.
The Strategy of Setting Up Mywifiext: Steps for Setup
Step-1
After unboxing, plug in your WiFi range extender to an electrical outlet.
Step-2
Turn on your PC or laptop.
Step-3
Launch a web browser on it.
Step-4
Type www.mywifiext.net in the address bar.
Step-5
Cross-check the entered mywifiext net details and press the Enter key.
Step-6
Input the username and password carefully. Once done, click on the Log In button.
How to Access Mywifiext net Login
Mywifiext is the foremost entrance for organising and controlling Netgear Wi-Fi extenders. The foremost objective of these extenders is to overhaul the Wi-Fi hail from your switch in orchestrate to expand its reach to regions that were as of now out of amplify. To overcome any question about whether your aggregate residential or exchange is secured by your Wi-Fi organisation, the beginning step is to present a Netgear Wi-Fi amplifier extender through Mywifiext. Indeed individuals lost specialised information can utilise it since the setup handle is obvious and straightforward to induce it.
Make past any question the Netgear Wi-Fi run extender is related to a control supply. Arranging the extension in a spot where it can get a strong hail from your existing farther organise is crucial. Once the extender is traded on, proceed to put through a contraption like a tablet, smartphone, or tablet to organise. Various individuals recognize this organisation as the one made by the extender and commonly named “NETGEAR_EXT.”

Upon meddling to the extender’s organiser, sort “mywifiext.net” or “mywifiext.local” in your web browser’s address bar to induce to the Mywifiext setup page. You’ll get to this one of a kind web address when your contraption is associated with the extender’s orchestrate. Within the event that you just endeavour to get to this page from another organisation, you’ll likely be involved in a mistake.
After you’ve gotten to the Mywifiext setup page, you’ll get information through a course of action of on-screen directions. You will need to select your current Wi-Fi orchestrate and input its watchword inside the setup wizard for the extender to set up an affiliation. After you’ve related to your Wi-Fi organisation, you will be able to modify the mystery word and title of the intensified orchestrate. Once the setup plan is wrapped up, your extender will be arranged to utilise and will offer amplified Wi-Fi scope all through your zone.
Common issues with Mywifiext
Without a doubt in showing disdain toward the reality that Mywifiext and Netgear Wi-Fi run extenders are arranged for client consolation, clients may still involve a run of issues in the midst of setup or utilisation. These flaws appear to run from minor unsettling influences to major issues that maintain a strategic distance from the extender from performing its pointing work. Learning around these standard challenges may help clients better recognize and comprehend issues with more noticeable proficiency.
One of the most noteworthy issues that clients go up against is the disappointment to reach the Mywifiext course of action page. The issue happens when the contraption endeavouring to interface to Mywifiext is customarily not related to the extender’s organisation. As said earlier, the Mywifiext location can because it were to be gotten to when related to the extender’s organisation. On the off chance that you’re on your essential Wi-Fi organisation or another organisation, the location won’t stack and a botched message will appear. Some time as of late endeavouring to induce Mywifiext, ensure that your contraption is related to the “NETGEAR_EXT” organised to comprehend the issue.
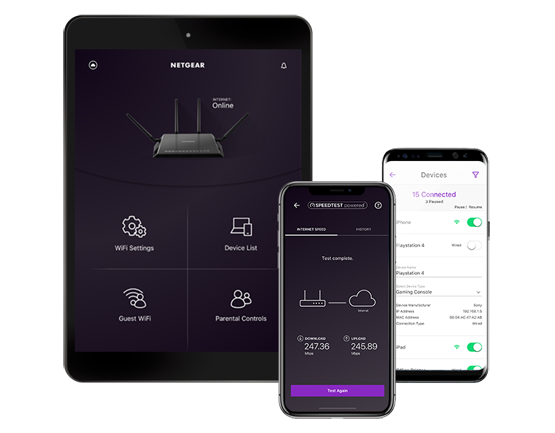
Connect, Monitor And Control
Now with the help of the Netgear Genie App you can easily connect with your home devices, control and even monitor them using your smartphone, tablet or even pc and that too with ease
Easy To Use Interface
Now managing your home devices is fun and easy, you need not be an expert to manage and control your home networking you can do all these with the help of the easy to use graphical interface of the application
Stream Seamlessly
Now using this app you can seamlessly stream your videos, music, and files using the My media in your network through your smartphone
Mywifiextt Dashboard
Intro To Connect Netgear Range Extender To A Hidden SSID
Another common issue is the circumstance of the Wi-Fi run extender. The extender must be put in a zone that gets an awesome hail from your switch for perfect execution. On the off chance that the extender is put as well removed from the switch, it may cause down and out execution and arrange issues due to its disappointment to effectively boost the hail. Physical obstacles such as furniture, dividers, and equipment can in addition exacerbate the Wi-Fi hail and diminish the extender’s viability.
How To Setup Netgear EX6150 Range Extender
Firmware changes may conceivably appear challenges for certain people. Comparable to keeping up with any other electrical thing, Netgear Wi-Fi expand extenders require typical firmware upgrades to be secure and operational. The extender may not work suitably, coming approximately in weaker signals or organising issues, on the off chance that the firmware is out of date. To form past any question the extender works authentically, it is essential to regularly check for firmware overhauls on the Mywifiext interface and present them right missing.
Contemplations for Settling Mywifiext Issues
You’ll endeavour these examining strategies in case your Netgear Wi-Fi run extender or Mywifiext setup isn’t working really. The taking after guide will help you get your extender working fittingly by tending to visit issues and promoting workable fixes.
Affirm within the occasion that your contraption is associated with the extender’s orchestrate on the off chance that you’re having a burden getting to the Mywifiext setup page. In case you’re sure you’re related to the correct organisation but are still having a burden seeing websites, endeavour to clear your browser’s cache and treats. You’ll as well endeavour utilising an elective web browser or contraption to see in case the issue perseveres.

How to do mywifiext Local Setup ?
Mywifiext.local is a way to install your netgear nighthawk wifi extender. The mywifiext.local setup page is only accessible on MAC or IOS devices. To know how to access mywifiext.local, move to our next section read carefully.
For mywifiext.local setup? Here are the steps:
- Power on your Nighthawk WiFi Extender and wait for the power light to turn solid.
- Grab a computer or a mobile device.
- Open web browser and visit mywifiext.local.
- Make sure your device is connected to the nighthawk extender network.
- Complete the Mywifiext local setup process, by following the on-screen steps.
- After the setup is complete, place the extender it at your desired location.
Looking For Help ?
Common Faq's Regarding your Router
- In todays digital age, where a strong and reliable internet connection is essential for both personal and
professional use, WiFi range extenders have become a vital tool. One such utility in setting up these
extenders is Mywifiext. It serves as a setup platform, specifically designed for NETGEAR WiFi range
extenders, enabling users to extend the coverage of their home or office WiFi networks. This article
provides a detailed explanation of Mywifiext, how to set up a WiFi range extender using this platform, and
some troubleshooting tips for common issues.
Mywifiext is a local web-based platform that helps users configure and manage their NETGEAR WiFi
range extenders. A WiFi range extender is a device that enhances the WiFi coverage of a router by
extending its signal range. This is particularly useful in large homes, offices, or areas with thick walls,
where WiFi signals tend to weaken or drop. By connecting to the extender, users can enjoy a stronger
and more stable WiFi connection throughout their space.
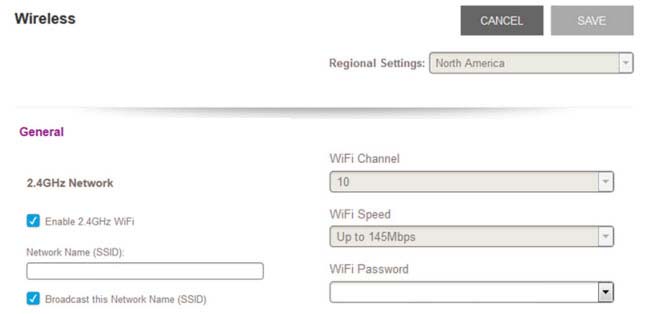
Do you know that the extender by default broadcasts its own wireless signal? Yup, it’s true! And due to its SSID or wireless network name, you can easily find it to connect to your smartphone, tablet, or PC.
However, anyone else can also connect to your network at ease. So better to create a hidden network. To do so, you just need to disable the SSID broadcast. Also, there is a need to manually enter the mywifiext.net login credentials for connecting to the hidden wireless network.
It seems the router is experiencing issues related to the following reasons. Please check to see if these problems are from the parent router.
- Issues with pre-shared key and SSID
- Problems with LAN card
- Your home router is not configured properly
- WiFi signal is dropping or lost
- Insufficient range
- Issues with firewall settings
- VPN problems
If the issue presists then please write to support@mywifitext.com and our technical team will contact you as soon as possible.
Once you are logged in, you can follow the on-screen instructions to complete the setup of your Netgear WiFi extender or manage your existing extender. The setup wizard will guide you through the process of connecting your extender to your main WiFi network and customizing its settings to your liking.
How to Set Up a WiFi Range Extender Using Mywifiext
Setting up a NETGEAR WiFi range extender through Mywifiext is a straightforward process. Follow these
steps to get started:
1. Plug in the WiFi Extender
First, place your extender in the same room as your WiFi router during the setup. This proximity ensures
a smooth connection between the extender and the router. Plug the extender into a power outlet and wait
for the power LED to turn solid green, indicating it is powered on.
2. Connect to the Extender’s Network
Use a computer or mobile device to connect to the extenders default WiFi network. The network name
(SSID) typically appears as “NETGEAR_EXT.” Once connected, open a web browser and enter the URL
mywifiext.net for Windows or mywifiext.local for Mac or iOS devices? (MyWiFiExt).
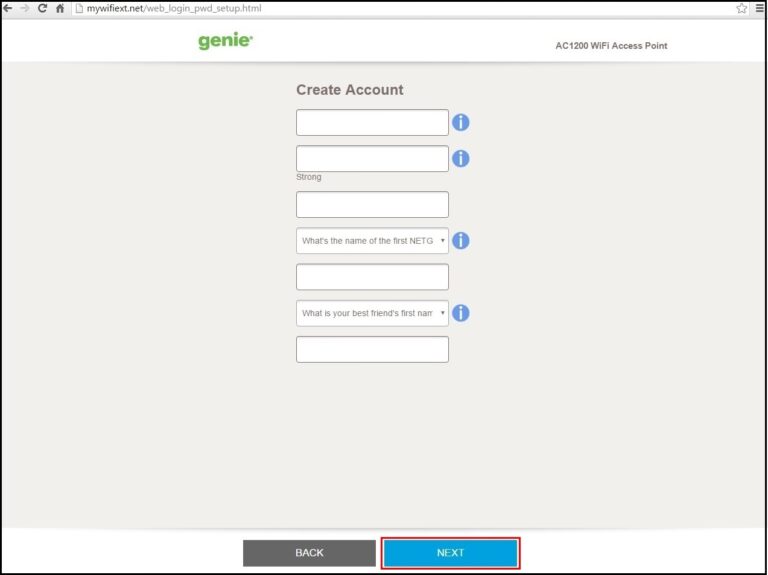
3. Log In and Configure the Extender
Once the Mywifiext page loads, you will be prompted to log in. For first-time setup, click on the New
Extender Setup button. You will need to create an account or log in with your existing NETGEAR
credentials. After logging in, follow the on-screen instructions to configure the extender. This process
involves selecting the WiFi network you wish to extend and entering the WiFi password. The extender will
then connect to the main router, boosting its signal.
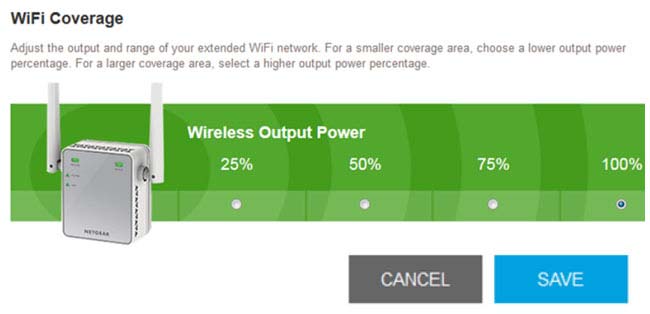
4. Relocate the Extender
After successfully configuring the extender, unplug it and move it to a location where the WiFi signal is
weak but still within the range of the main router. Plug the extender back in and wait for the connection to
be established. The device will now begin amplifying your routers
My WiFi extender says no internet. Why?
My WiFi extender indicates no internet is another frequent problem that has many WiFi extender customers scratching their heads. If your extender is not installed correctly or you are not receiving proper internet from your Internet Service Provider, a problem may arise.
Ping the router to which your WiFi extender is attached to see whether you are receiving internet from your ISP in order to resolve the WiFi extender reports no internet issue. If it is not the cause of the issue, reset your range extender and reinstall it. Get in touch with our technical experts for quick setup of your WiFi extender.
WiFi extender causing problems after firmware update?
- In case you forgot your user name or password, use the Username & Password help link
- If an error page is displaying, type http:// in the address field prior to the address as http://www.mywifiext.net
- If the extender has been set up but you are unable to connect to WiFi, check to see if the device LED is off or red
- Use an Ethernet cable to connect your computer to the extender to get a working WiFi connection
Netgear WiFi extender app creating issues.
- It is possible that you typed the incorrect network name or password
- Use the Smart Setup to select a WiFi network and retype the password. The password is case-sensitive. For example, NETWORK22 is not the same as Network22 or network22
- If the extender is unable to detect your WiFi network, check if your WiFi network is working or not. Move the extender closer to the WiFi router, if possible
- Remove the physical obstacles between the extender and the WiFi router, and try to keep the extender closer to the WiFi router
Why is my wifi extender so slow?
No one likes to use the internet with lag. This is why another frequently asked question that our team of experts handles every day is – why is my wifi extender so slow. If you are also looking to boost your WiFi then check the troubleshooting tips from the table of our experts written below:
SUPPORT PRODUCTS
- Netgear EX3700 Setup
- Netgear EX3920 Setup
- Netgear EX2700 Setup
- Netgear WN2500RP Setup
- Netgear WN3500RP Setup
SUPPORT PRODUCTS
- Netgear EX3700 Setup
- Netgear EX3920 Setup
- Netgear EX2700 Setup
Contact Us
Feel free to contact us.
support@netgaerextendersetup-com.pro